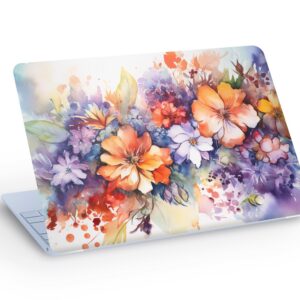
Why Bubbles Form Under Vinyl Decals
Vinyl decal bubbles occur when air gets trapped between the decal and the surface during application. This happens for several reasons: applying the decal too quickly, not using enough pressure, uneven surface preparation, or moisture between the decal and the surface. Understanding the cause helps you prevent bubbles in the future while also knowing how to fix existing ones.
Bubbles aren’t just cosmetic issues—they can also weaken the adhesion of your vinyl decal, reducing its lifespan and making it more prone to peeling or lifting at the edges.
Essential Tools for Bubble Removal
Before you start removing bubbles, gather these simple tools:
- Squeegee or credit card: A plastic squeegee works best, but a credit card is a reliable alternative
- Needle or pin: A fine-pointed tool to puncture small bubbles
- Heat source: A heat gun or hair dryer for stubborn bubbles
- Microfiber cloth: For gentle wiping and smoothing
- Rubbing alcohol: To clean the surface before reapplication
Method 1: The Squeegee Technique
This is the most effective method for larger bubbles and works on most surfaces. Start by positioning your squeegee at the center of the bubble. Apply gentle, steady pressure while moving outward toward the edges. The goal is to push the trapped air out gradually without applying so much force that you damage the decal.
Work slowly and deliberately, using long, smooth strokes. You may need to repeat this process several times for stubborn bubbles. Wipe away any moisture that appears with a microfiber cloth. This method works wonderfully on laptop skins and other flat surfaces where you can apply consistent pressure.
Method 2: The Needle Puncture Method
For small, isolated bubbles, the needle method is quick and precise. Carefully puncture the bubble with a fine-pointed needle or pin, making the smallest hole possible. The air will escape through this tiny opening. Once the bubble deflates, use your squeegee to press the decal back down firmly, pushing any remaining air out through the pinhole.
This technique is ideal when you don’t want to disturb the entire decal. It’s particularly useful for decorative vinyl decals where minimal manipulation is preferred. Just be careful not to tear the vinyl itself—use a gentle, controlled motion.
Method 3: Heat Application for Stubborn Bubbles
Heat makes vinyl more pliable, which can help release trapped air. Using a heat gun or hair dryer on low setting, gently warm the area around the bubble for 15-20 seconds. Keep the heat source moving to avoid overheating one spot, which could damage the decal or the surface beneath it.
Once the vinyl is warm and flexible, immediately use your squeegee to push the bubble outward. The heat allows the vinyl to conform better to the surface and release the trapped air more easily. This method works exceptionally well on curved surfaces where air pockets tend to form.
Prevention Tips for Future Application
The best approach to bubbles is preventing them from forming in the first place. Always start applying from the center of your decal and work outward in all directions. Apply steady, moderate pressure with your squeegee as you go. Ensure your surface is completely clean and dry before application—any dust, moisture, or debris will trap air underneath.
Take your time during application. Rushing increases the likelihood of air pockets. If you’re working with large decals, consider using a spray application method for smoother, bubble-free results. Check out our full collection and look for application guides included with your order.
Special Considerations for Different Surfaces
Different surfaces require slightly different approaches. On smooth surfaces like laptops or glass, the squeegee method works best. On textured surfaces, you may need to apply more pressure to ensure the decal settles into the texture. For curved surfaces like vehicle windows, heat application combined with gentle squeegee work prevents bubbles from forming in the first place.
If you’re working with intricate designs like our Phoenix Fire Bird Compass vinyl decal, take extra care around detailed areas where air pockets easily form.
When to Remove and Reapply
If bubbles persist despite your efforts, sometimes the best solution is removing the entire decal and reapplying it. Use a heat source to warm the edges, then carefully peel it away. Clean the surface thoroughly with rubbing alcohol and allow it to dry completely. Apply the decal again, this time taking extra care to work out air as you go.
For high-quality vinyl like our Arabian Horse laptop skin, reapplication is straightforward since quality vinyl can typically be repositioned without losing adhesive strength.
Final Thoughts
Vinyl decal bubbles are a minor setback, not a permanent problem. With the right techniques and tools, you can remove them quickly and achieve a professional-looking result. Whether you choose the squeegee method, needle technique, or heat application, patience and gentle pressure are your best friends. Master these skills, and you’ll enjoy flawless vinyl decals every time.
Ready to apply your next decal? Browse our complete selection of vinyl decals and stickers to find the perfect design for any project!
Featured Products
Blue Wavy Shapes LAPTOP SKIN Decal Sticker, Blue Swirl Abstr…

Idaho State Fender Vent Vinyl Decal Sticker, JL / JLU / JT F…