
Understanding Vinyl Decal Layering Basics
Vinyl decal layering is a creative technique that transforms simple designs into visually stunning, multi-dimensional artwork. By stacking multiple vinyl pieces strategically, you can create depth, dimension, and visual interest that catches the eye. Whether you’re decorating a laptop, vehicle, or any other surface, mastering this skill will elevate your customization game.
Layering involves applying multiple vinyl decals on top of each other with intentional spacing or overlap. This technique works exceptionally well for creating shadow effects, adding texture, building complex designs, and playing with color gradients. The key is understanding how colors interact and planning your design layout before you start applying.
Planning Your Layered Design
Before cutting vinyl or applying anything to your surface, take time to visualize your final product. Sketch your design on paper or use digital design software to map out each layer. Consider these essential elements:
- Color Selection: Choose complementary or contrasting colors that work together harmoniously
- Size Variations: Plan different sizes for each layer to create dimension
- Spacing: Determine how much overlap or gap you want between layers
- Order of Application: Decide which color goes down first, second, and so on
A well-planned design prevents mistakes and ensures professional results. Create a mock-up using printed designs or transparent paper overlays to test your concept before committing to vinyl.
Essential Tools and Materials
To successfully layer vinyl decals, you’ll need quality materials and the right tools. Invest in high-quality vinyl from reputable suppliers, precision cutting tools, and application equipment. Transfer tape is absolutely crucial—it holds multiple layers in alignment during application.
Have the following items ready:
- High-quality vinyl in multiple colors
- Sharp cutting tools or a vinyl cutter
- Transfer tape (application tape)
- Squeegee or application tool
- Ruler or measuring tape
- Cutting mat
- Cleanup supplies
The better your tools, the more precise your layering will be, resulting in professional-looking designs.
Step-by-Step Layering Process
Step 1: Cut Your Designs Start by cutting each layer of your design from different colored vinyl sheets. Ensure all pieces are cut precisely according to your planned measurements. Accuracy at this stage prevents alignment issues later.
Step 2: Prepare Your First Layer Apply your base layer vinyl to the surface following standard application techniques. Use your squeegee to eliminate air bubbles and ensure strong adhesion. Allow this layer to set before applying subsequent layers.
Step 3: Align Your Second Layer Position your second layer directly over the first. Use a ruler or measuring tape to ensure perfect alignment. Transfer tape helps keep pieces stable during repositioning. Apply pressure evenly across the entire piece.
Step 4: Continue Building For designs with more than two layers, repeat the alignment and application process. Work methodically, allowing each layer adequate time to adhere before adding the next one.
Pro tip: Remove transfer tape slowly and at a 45-degree angle to prevent lifting previously applied layers.
Advanced Layering Techniques
Once you’ve mastered basic layering, explore advanced techniques for even more impressive designs. Colorful geometric patterns demonstrate how multiple layers of complementary colors can create visual depth.
Shadow Layering: Create shadow effects by slightly offsetting identical designs in different colors. This technique adds dimension and makes designs pop off the surface.
Color Blending: Use semi-transparent vinyl or overlapping areas to create blended color effects. This works beautifully on laptop skins and vehicle decals.
Textured Layering: Combine different vinyl finishes (glossy, matte, metallic) in your layers for interesting tactile and visual effects.
Design Inspiration from Our Collections
Looking for layering inspiration? Check out designs like the DRAGON Compass Vinyl Decal, which demonstrates how intricate details benefit from layered application. The Mushrooms Laptop Skin showcases how psychedelic colors layer beautifully to create immersive artwork.
For vehicle enthusiasts, the Angry Octopus Warrior Fender Vent Decal demonstrates professional-quality layering on automotive surfaces. Explore our full collection of vinyl decals and products for more design ideas.
Common Layering Mistakes to Avoid
Even experienced creators make layering errors. Here are mistakes to watch for:
- Poor Alignment: Rushing the alignment process leads to crooked, unprofessional results
- Inadequate Drying Time: Applying layers too quickly prevents proper adhesion
- Over-handling: Touching layers excessively during application causes lifting and wrinkles
- Ignoring Surface Prep: Preparing surfaces for vinyl decals is crucial for layered designs to adhere properly
- Wrong Vinyl Type: Using incompatible vinyl types can cause adhesion issues between layers
Caring for Your Layered Vinyl Designs
Layered decals require proper care to maintain their stunning appearance. Clean gently with mild soap and water, avoiding harsh chemicals that can damage the adhesive. Keep layered designs away from extreme heat and direct sunlight when possible, as UV exposure can cause color fading over time.
For outdoor applications, consider applying a protective clear coat over your layered design for extended durability and color protection.
Final Thoughts
Vinyl decal layering opens up infinite creative possibilities. With careful planning, quality materials, and precise execution, you can create professional-grade designs that impress. Start with simple two-layer designs and gradually progress to more complex multi-layered artwork as your skills improve. The satisfaction of creating stunning, multi-dimensional vinyl art is absolutely worth the effort!
Featured Products
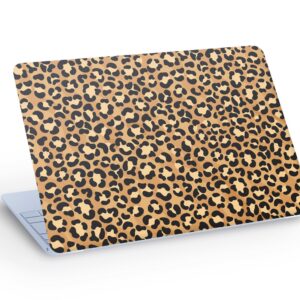
CHEETAH Skin Pattern LAPTOP SKIN Decal Sticker, Cheetah Skin…
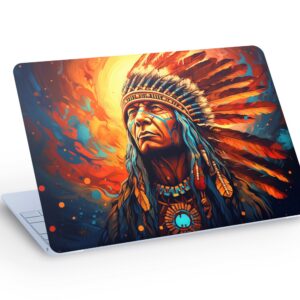
Native American LAPTOP SKIN Decal Sticker, Macbook Skin, Ind…