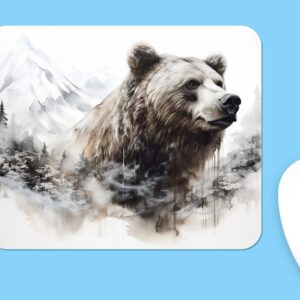
Master Mouse Pad Customization: Design & Print Guide
Mouse pads are one of the most practical and personal items you can customize. Whether you’re creating a gift for a colleague, branding your workspace, or expressing your personality, a custom mouse pad combines functionality with style. At JuliDecals, we’re passionate about helping you design mouse pads that look professional and last for years. This comprehensive guide will walk you through every step of the customization process.
Why Customize Your Mouse Pad?
A personalized mouse pad serves multiple purposes. It protects your desk surface, provides ergonomic support for your wrist, and acts as a constant visual reminder of what matters to you. Unlike generic mouse pads, custom designs reflect your personality, brand identity, or commemorate special moments. Whether you’re a professional designer, gamer, student, or office enthusiast, a customized mouse pad elevates your workspace aesthetics.
Choosing the Right Mouse Pad Base
Before you start designing, select a mouse pad that suits your needs. Consider the following factors:
- Material: Rubber bases provide durability and slip resistance, while cloth surfaces offer comfort and precision tracking. Choose based on your mouse type and comfort preference.
- Size: Standard sizes range from 7×9 inches to 12×10 inches. Measure your workspace to determine the ideal dimensions for your setup.
- Thickness: Thicker mouse pads (approximately 0.25 inches) provide better wrist support and comfort during extended use.
- Edge finish: Stitched or sealed edges prevent fraying and extend your mouse pad’s lifespan.
Designing Your Custom Mouse Pad
The design phase is where your creativity shines. When creating your mouse pad design, keep these principles in mind:
Keep It Simple and Focused
Mouse pads have limited space, so avoid cluttering your design with too many elements. A single focal point or a cohesive pattern works best. Think about what will be visible when your mouse sits on the pad—this area should contain your most important design elements.
Consider Color Psychology
Colors affect mood and productivity. Cool tones like blue and green promote calmness, while warm tones like orange and red energize. For professional settings, neutral backgrounds with accent colors create a polished appearance. Check out our Vibrant COLORFUL Art designs for inspiration on striking color combinations.
Choose High-Resolution Graphics
Always use images with at least 300 DPI (dots per inch) to ensure crisp, clear printing. Low-resolution graphics will appear blurry or pixelated on your finished mouse pad. Test your design at actual size before printing.
Preparing Your Design File
Proper file preparation is crucial for a successful final product:
- File format: Use PNG or PDF files with appropriate dimensions matching your mouse pad size.
- Bleed area: Add 0.125 inches of extra design around the edges to account for printing variations.
- Font selection: Use web-safe fonts and ensure text is at least 8pt for readability.
- Color mode: Save files in CMYK color mode for accurate color reproduction in printing.
Vinyl Decal Application on Mouse Pads
If you’re using vinyl decals to customize your mouse pad, the application process requires precision:
Surface Preparation
Clean your mouse pad thoroughly with a damp cloth and allow it to dry completely. Remove any dust, oils, or debris that might prevent proper adhesion. Let the surface cure for at least 24 hours if it’s brand new.
Design Placement
Plan your vinyl decal placement carefully. Consider the mouse’s resting position and ensure important design elements won’t be covered during daily use. Use a ruler or measuring tape to center your design for a professional appearance.
Application Technique
Using transfer tape, carefully apply your vinyl decal to the mouse pad surface. Start from the center and work outward to eliminate air bubbles. Use a squeegee or card to firmly press the decal, ensuring complete contact with the surface. Remove transfer tape at a 180-degree angle for clean results.
Design Inspiration Ideas
Stuck on what to design? Consider these popular themes:
- Nature-inspired: Floral patterns like our Painted ROSES designs or animal motifs such as the Shiba Inu DOGS collection
- Minimalist: Simple geometric shapes, monograms, or elegant typography
- Themed: Gaming, anime, movies, or hobby-specific graphics
- Branded: Company logos, team mascots, or personal brand elements
Protecting Your Custom Mouse Pad
Once your mouse pad is complete, protect your investment:
- Apply a clear protective coating for durability and stain resistance
- Avoid placing hot items on the surface
- Clean gently with a soft, damp cloth
- Store in a cool, dry place when not in use
- Rotate your mouse pad periodically to ensure even wear
Troubleshooting Common Issues
If you encounter problems during customization, here are quick solutions. Bubbles appearing under vinyl? Use a heat gun on low setting to gently warm the area, then press out remaining air. If colors appear faded, ensure your file is in CMYK mode and your printer settings are optimized for photo quality. For vinyl that won’t stick, double-check that your mouse pad surface is clean and dry before application.
Ready to Create Your Masterpiece?
Customizing a mouse pad is a rewarding project that combines design skill with practical function. Whether you’re creating a gift or personalizing your workspace, following these guidelines will help you achieve professional results. Browse our complete collection of vinyl decals and customization products to find inspiration and supplies for your project.
Start your customization journey today and transform your mouse pad into a true reflection of your style and personality. With proper planning, quality materials, and careful execution, you’ll create a mouse pad that’s both beautiful and built to last.