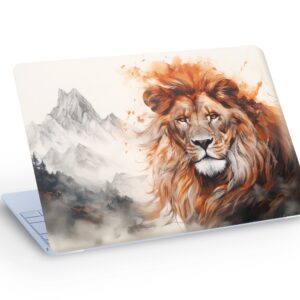
Why Proper Vinyl Decal Application Matters
Applying vinyl decals might seem straightforward, but technique matters significantly. A poorly applied decal can bubble, peel, or misalign, ruining the aesthetic of your laptop, vehicle, or wall. Understanding the fundamentals of vinyl decal application ensures your investment looks professional and lasts for years.
Whether you’re decorating a Blue LIGHTNING LAPTOP SKIN or applying adventure-themed stickers to your 4×4, mastering application techniques transforms your results.
Essential Tools for Vinyl Decal Application
Before you begin, gather these essential supplies:
- Squeegee or credit card: For smoothing out bubbles and ensuring adhesion
- Isopropyl alcohol: Cleans surfaces thoroughly before application
- Lint-free cloth: Prevents dust and fibers from interfering
- Spray bottle: Helps with positioning and prevents premature sticking
- Sharp utility knife: For trimming excess transfer tape if needed
- Ruler or measuring tape: Ensures proper alignment and centering
Step-by-Step Application Process
1. Prepare Your Surface
Surface preparation is the foundation of successful vinyl decal application. Clean the area thoroughly with isopropyl alcohol on a lint-free cloth. Remove any dust, dirt, grease, or residue. Allow the surface to dry completely—moisture prevents proper adhesion and causes bubbling.
2. Plan Your Placement
Before peeling the backing, use a ruler to mark where your decal will go. For larger designs like the LETS TRAVEL MORE Compass Vinyl Decal, measure twice to ensure centered placement. Mark light pencil points at the corners—these serve as guides without damaging the surface.
3. Apply the Decal
Gently peel back one corner of the transfer tape to test adhesion. If it sticks properly, slowly peel the entire backing away at a 45-degree angle. This prevents tearing and ensures the vinyl stays on the transfer tape. Position the decal at your marked points.
4. Smooth and Secure
Using your squeegee or credit card, apply firm, even pressure from the center outward. This eliminates air bubbles and ensures complete adhesion. Work systematically across the entire decal, paying extra attention to edges and corners. Use light, repetitive strokes rather than aggressive pressing.
5. Remove Transfer Tape
After thoroughly squeegeing, gently peel away the transfer tape at a 45-degree angle. If the vinyl lifts with the tape, press down again and allow it to set for a few minutes before trying again. Patience during this step prevents damage to your newly applied decal.
Pro Tips for Flawless Application
Temperature matters: Apply vinyl decals in temperatures between 50-85°F. Cold surfaces reduce adhesion; excessive heat can make vinyl too sticky and prone to stretching.
Work slowly: Rushing leads to bubbles and misalignment. Take your time with each step, especially when removing transfer tape.
Use the spray bottle method: For large decals, lightly spray the surface with a soapy water solution before application. This gives you repositioning time, though it requires extra patience for drying.
Practice with small decals first: If you’re new to vinyl application, start with smaller designs like TROPICAL Leaves LAPTOP SKIN before tackling larger projects.
Common Application Mistakes to Avoid
- Skipping surface preparation: Dirt and oil prevent proper adhesion
- Working in extreme temperatures: Affects vinyl flexibility and adhesive strength
- Pressing too hard: Can stretch the vinyl or damage underlying surfaces
- Rushing the transfer tape removal: Causes the vinyl to lift prematurely
- Applying to curved surfaces without scoring: Leads to bubbling and peeling
Different Surfaces, Different Techniques
Vinyl application varies slightly depending on your surface. For wall decals, use light pressure to avoid damaging paint. For vehicle applications, ensure the paint is in good condition and properly cleaned. Laptop skins require careful alignment since repositioning can stress the adhesive.
Ready to Perfect Your Technique?
Master vinyl decal application with the right approach, tools, and patience. Whether you’re decorating with adventure themes like the Hiker Vinyl Decal Sticker or adding style to your tech, these techniques ensure professional results.
Ready to transform your surfaces? Browse our complete collection at JuliDecals shop and find the perfect vinyl decals for your next project. With proper application techniques, your decals will look stunning and last for years to come.
Featured Products

VIKING WARRIOR Compass Vinyl Decal Sticker, Compass Rose Dec…


Colorful Printed Shark Fender Vent Vinyl Decal Sticker, JL /…